So, you want to make soap and turn it into a life-changing business? You have come to the right place! Soap has a long and rich history dating back to the Stone Age when, as historians believe, people would rub the sap of the soap plant or soapwort through running streams and river water to cleanse themselves.
But it was the ancient Babylonians who committed the first soap recipe to history by writing it down on a clay tablet in about 2800 BC. It consisted of water, a strong alkali base, and fatty cassia oil — the foundation that prompts saponification; the chemical reaction that is vital to make soap.
The soap markets burgeoned between the 12th and 15th centuries, still using the relatively-unchanged method of adding various fatty oils to an alkaline base such as lye or potash. Nowadays soap makers add scents, colourings and incredible creativity to bolster this centuries-old craft and delight their customers.

How to Make Soap Safely
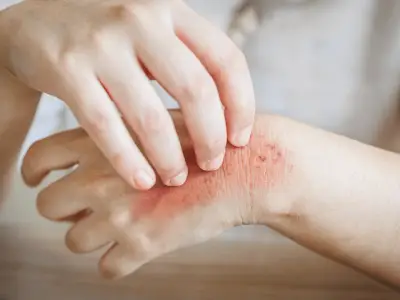
While lye is the alkaline base that will make your soap feel great to your customers, you must be aware it is a chemical substance and must be treated accordingly. When mixing lye with water always add the lye to the water — which should be room temperature — and not the other way around, to avoid an effervescent and hot reaction. Likewise, avoid using glass receptacles in case a heat reaction occurs and shatters the glass.
Wear goggles and gloves when handling lye and raw soap that is less than 24 hours old. It’s also advisable to wear a mask to protect yourself from fumes. Should the lye come into contact with your skin, run it under cold water immediately to prevent burns. Furthermore, lye should never be ingested, so keep it out of reach of children and animals.

The Equipment You Will Need to Make Soap
- Protective clothing
- Safety goggles, gloves and mask
- Scales (kitchen scales are fine)
- Thermometer
- Stick blender
- Clearly marked stainless steel or tough plastic containers
- Heavy-duty spoons and spatulas
- Soup moulds - alternatively you can use a cardboard box lined with parchment paper
Choosing the Right Oils to Make Soap
Oils are vital ingredients in your soaps and have the power and potency to elevate the soap’s uses, appearance and quality. You can choose hard oils — solid or semi-solid at room temperature — or soft oils, which are liquid at room temperature.

Hard oils include coconut and argan oils, which lather well, and soft oils include sunflower, almond, avocado, apricot kernel, and olive oil, which have excellent conditioning properties. Castor oil is also a great addition to your workshop shelves for its incredibly soapy lather.
Choosing the Right Additives to Make Soap
First and foremost, you must choose good quality and high-grade additives for your soap as they will come into contact with your customers’ skin. The additives you choose should be specially selected depending on who you are creating soap for. While properties such as anti-ageing and deep cleansing are important to create an effective soap for your customers, the scent is also key.
You can either select fragrance oils, which are stable but synthetically made to create a balanced aroma, or utilise a variety of essential oils, which are naturally occurring but can only comprise 3% of your soap’s ingredients to comply with EU regulations.

You should also be aware that certain base oils — such as natural butter like shea and oils such as neem — have scents of their own that can affect the overall aroma. There are benefits and drawbacks to both fragrance oils and essential oils so play around with whichever method works for your practice.
A general rule of thumb when blending essential oils is to use 10% base notes, 30% top notes and the remaining 60% middle notes. You can also add in botanicals such as lavender or seaweed for a scrub, and a plethora of other lovely-smelling additives depending on your inspiration.
Another great way to create unique and sellable soaps is with colour. Synthetic options are available and will give you vibrant hues. However, there are many natural alternatives that not only produce beautiful earthy colours but may also add therapeutic benefits.

For example, poppy seeds and coffee are effective exfoliants to add to soaps, while clay gives soap a gorgeously rich tone and detoxifies the skin. Many of these naturally occurring colourants, such as saffron and spearmint, can even be found in your kitchen cabinet!
A full list of essential oils, botanicals, other additives, and their notes or aromas can be found in our Soap Making Business Diploma Course, alongside some excellent recipes to get you started, including turmeric soap. You’ll also find methods on how to create colour patterns, layers and unique decorations for your soaps. As there is so much to the incredible ancient craft, we will stick to the basics in this blog.
Using the Cold Process to Make Soap
While the cold process is the most popular method used to make soap as it allows you to control every drop that goes into each bar of soap, it is also the most complex, time-consuming and requires you to start making your soap from scratch.

Here’s a step-by-step guide:
- Prepare your workstation, protective equipment and ingredients.
- Prepare your lye water mixture in accordance with your recipe, taking necessary safety measures, and set it aside to cool.
- Prepare your base oils by melting any hard oils over the stove on a medium heat. Once liquified, remove from the heat and add the soft oils.
- Once both mixtures have reached room temperature, you can start slowly mixing your lye water mixture into your base oils until saponification occurs upon reaching a thin trace point, when the mixture just begins to thicken and turn opaque.
- You can now add your additives in this order: colours, followed by botanicals, and finally, essential oils.
- Once added, pour your soap into the moulds and insulate carefully so the raw soap can be left for 24 hours to firm up. Please note: this can take longer than 24 hours if using soft oils.
- Unmould the soap once firm and, if necessary, cut using a soap cutter.
- Leave your soap bars to cure for four to six weeks and then package for sale.
Using the Hot Process to Make Soap
The hot process to make soap is much the same as the cold process. However, due to the high temperatures achieved, the soaps can be used immediately after hardening without the long wait times for curing required in the cold process. This is similar to the process commonly used in candle making.

Here’s a step-by-step guide:
- Prepare your workstation, protective equipment and ingredients.
- Prepare your lye water mixture in accordance with your recipe, taking necessary safety measures, and set it aside to cool.
- Prepare your base oils by melting any hard oils over the stove on a medium heat. Once liquified, remove from the heat and add the soft oils.
- Turn to a low heat and add the lye mixture, stirring until it starts to thicken to trace.
- Leave the soap to cook on a low heat for a while, keeping an eye on the mixture, ensuring it begins to bubble until it takes on a waxy texture.
- Add colours and botanicals to your mixture, allowing it to cool slightly before you add the essential oils.
- Scoop the mixture into your moulds, moving quickly and efficiently.
- Leave the soap in the mould to cool and harden for between 24 and 48 hours.
- Following the hardening, you can either use your soaps immediately or leave them to cure for a week or two. The longer the cure, the milder the soap.
Using the Melt and Pour Process to Make Soap
A lot of people who are new to soap making opt for the melt and pour method, for its simplicity. The benefits are that it allows you to get to grips with aromas in a short space of time - and it can even be done with children as a fun activity. Other accomplished soap makers also use this technique for more complex designs, to save time in otherwise lengthy processes.

Here’s a step-by-step guide:
- Microwave your unscented soap base or heat in a pot on the stove until melted.
- Add your colours, botanicals, and fragrances.
- Pour the mixture.
- Leave to set for 24 hours.
- You can start using your soap straight away with no curing required.
Using the Rebatching Process to Make Soap
Rebatching is a great method to make soap using unsuccessful attempts or leftover soaps from previous batches. It’s incredibly simple in that you’ve already done all the hard work!

Here’s a step-by-step guide:
- Take your leftover soap and grate it into a pot with a cheesegrater, unless still soft, in which case you can simply divide it into chunks.
- Add some water and any extra colourant to the pot and place on a medium heat.
- Once it gets back to the trace point — which could take up to four hours — you may include additives as above, again letting it cool before you add essential oils.
- Quickly pour the mixture into your moulds in preparation for hardening.
- Once cooled completely, your soaps can be cut and cured until hard enough to use.
Make Your Soap Sell
Before you think about taking your soaps to market, offer samples to trusted family and friends for some constructive criticism on your recipes. This should help guide you and will prove invaluable when it comes to selling your soaps.
Now, it’s time to park your passion for the craft for a moment and examine the feasibility of starting a business and entering this luxury market. It is estimated that there are 300,000 handmade soap businesses in the US.

But the popularity shouldn’t put you off. It proves there is high demand for this product — your soaps, too — should you get the product, business model, and marketing right.
The steps to determine the feasibility of your business are as follows:
- Construct a business plan, including descriptions of your product, demographic and USP.
- Do market research to determine your market feasibility.
- A SWOT (strengths/weaknesses/opportunities/threats) analysis will help with the above two stages.
- Invest in the equipment you’ll need to become a technically feasible business — and don’t forget to think beyond the actual soap making.
- Crunch the numbers — considering start-up costs, insurance, trademarking, investments, and potential profit — to see if your business is financially viable.
- Plan your organisational and administrative structure to ensure good and slick customer service and operational running of the business, including adhering to regulations.
Once you’ve confirmed the feasibility of your business, it’s time to start the setup. Between insurance, funding, picking a name, trademarks, finding suppliers, considering how you’ll trade, and compliance, this process can be long, taxing and complex, so come up with some goals and keep them SMART: Specific, measurable, achievable, relevant and timed.

With a compliant and responsible business set up to sell your soaps, you’ll have to now attract customers who want to buy your creations. The best way to entice people to your quality and beautiful soaps over any others on the market is to establish an engaging brand. A great brand creates an emotional and psychological connection with your customer that will prove invaluable and keep them coming back.
To begin to create a brand, consider why you want to make soap and who for; build your brand around this. Create a mission statement, a logo, a brand voice, packaging, product photography, and an online presence that reflects your ethos across your whole business.
A clear and engaging brand will really help you when constructing a marketing strategy to sell your soap, using this to decide what content to share with your customers depending on where they shop. The great news is, with advancements in social media and online technologies, anyone with a WiFi connection can execute a cutting-edge marketing strategy with little financial investment at the start-up stage and room for investment as you grow.

Here are some marketing avenues to explore:
- Email newsletters
- Influencer and affiliate marketing
- Video and static content on social media
- Social media giveaways
- Collaborations with other like-minded brands
- Partnerships with local businesses, such as hospitality
- Blogging
- Posters and flyers
- Print advertisements
- Digital paid advertising on social media and Google
- Trade shows and craft fairs
- Referral programmes
- PR and media interviews
- TV and radio advertising

If you’ve got this far, it’s clear that you have the passion and drive to make a successful handmade soap business. While there is a lot to take in — and so much more to explore in our diploma — make sure to go at your own pace and keep those SMART goals in mind to avoid burnout.
You got here because you are a creative, entrepreneurial and passionate person and you are on the road to success! Just don’t forget to stop and smell the rosehip soap every now and then.
At the time of publishing, entering the code LEARNING in the checkout will reduce the price of our
Soap Making Business Diploma Course to £29.